Here is an overview of the Home networking lab setup. You might ask why even have a home lab these days? You can build a fairly grown up enterprise grade topology using virtualization? Agreed, especially if you have high spec workstation or choose a cloud provider for the compute.
Why I built a home lab
For many years all my lab work was done using either my home PC gaming rig or my laptop using VMware workstation. This setup served me well but had limitations. Specifically the gaming PC was too noisy and consumed too much power to be left on 24 x 7. Also with both the gaming rig and the laptop I regularly hit scaling limitations with RAM. From my experience you’ll run out of RAM way before CPU utilization when building large topology’s.
I needed to leave topology’s powered on for days or sometimes weeks at a time. My lab is used almost daily to assist me with customer testing, my own training requirements and working through designs. I wanted a lab that was ‘always on’ so that I could duck in and out of it at a moments notice. Sometimes you just want to do a quick and dirty test before implementing a change to a production network. Having a lab that’s online and ready to go enables me to do this quickly.
 High Availability
Working as an independent consultant my lab has become a critical component to me. I made high availability in scope and wanted to be able to account for a SPOF (single point of failure) where possible.
You might ask “But its a lab, if a device fails surely you could just order another one on next day delivery and be back online in a couple of days”. I’ll answer that question with a single word – Procurement.
Researching the components for the home lab took many hours of reading through product reviews before making a decision on which kit to purchase. Sometimes I need to get properly in among the weeds when working with customers on projects involving long hours. This can leave very little time available for procurement and installation of failed lab kit. When I’m working away from home I need to know that if a device fails, replacing it can wait until I get a chance to procure a replacement and provision it.
In some respects it wasn’t twice the cost to double up on kit. One example are the switches, when I calculated the required port density to accommodate all the physical kit I would have needed a 48 Port Switch. Two 20 port switches provide the port density required and the cost for both switches was only a little more than the cost of a single 48 port switch.
Not just a lab
The new network was to be used as a lab but also my home production network. “Nick – its not a lab if you rely on it for production services” I agree, but I was not going to make an investment on equipment solely for lab use. I wanted to leverage the new architecture for applications and services we use at home. The other reason for combining the two is actual meaningful traffic, i.e real users. When the home network is not running at top performance the family are quick to escalate and log a fault ticket with me, especially when prevented from watching their favorite TV show.
Below is a list of some requirements I wanted to meet:
- All devices should be low power consumption as it will all be run from home and online 24 x 7
- All attempts should be made to account for a single point of failure (within reason)
- Low noise – some of the kit (Switches) will be homed in built in wardrobes / cupboards inside the house so must be close to or silent.
- The servers used as hypervisor host’s should be low power, quiet and a fair amount of compute power
- Must be able to power up/down sections of the lab to save power when not in use
Physical Topology
Switches
Cisco SG300 switches are low cost business grade switches that support a plethora of features most of which I’ll never use. They forward at line rate, non-blocking and most of the models are fan less and completely silent. I have four of them in total. Their also layer 3 capable (static routing only and no support for VRRP or HSRP)
2 x Cisco SG300-20
Used as core switches.

2 x Cisco SG300-10MPP
10 Port POE enabled which I use as access layer switches. These are strategically placed in different locations in the house to reduce the amount of cabling. The IP cameras wireless AP’s and various kit connect to these switches.

Ubiquity Unifi 8 port POE switch
I use the Unifi Switch as an internet edge switch. The Unifi Security Gateway connects to the network via the Unifi Switch.

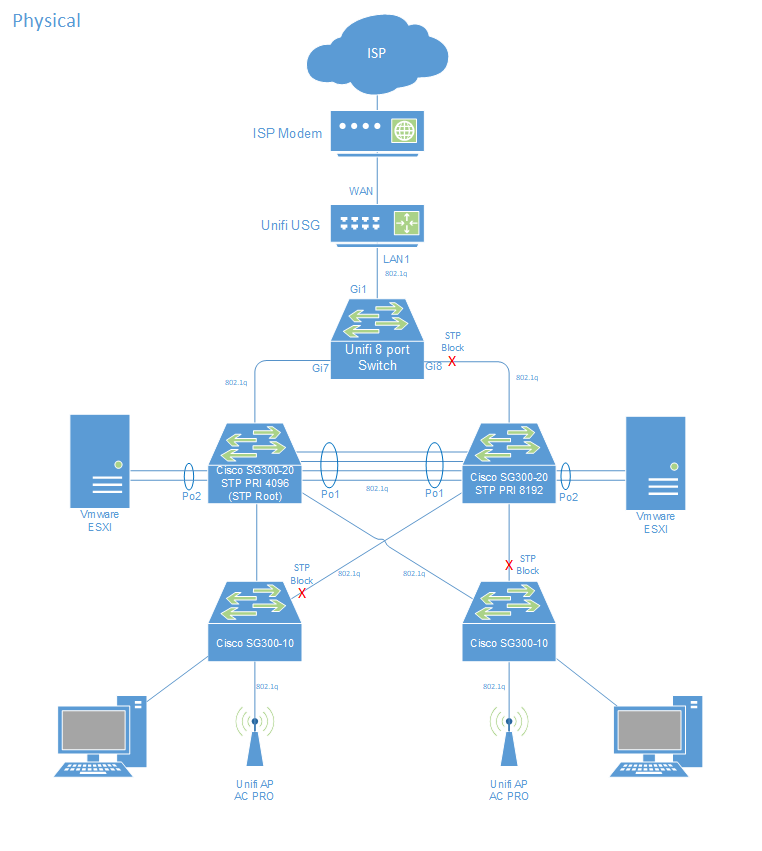
The physical topology diagram below details how all the switches are connected along with some of the other components in the lab:
 2 x Lenovo TS140 Servers
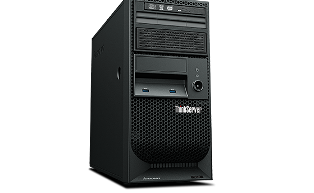
Built as VMware ESXi hypervisors. Quad core Intel Xeon CPU’s and 32GB RAM in each.
This gives me a total of 8 cpu cores and 64GB of memory for compute power across the two servers. Their low power consumption (average of 40 watts per server according to my UPS) and very, very quiet.
The Xeon based CPU models of these servers have the Intel AMT baked into the silicon. This enables me to remotely power on / off the servers using a web gui interface similar to the HP iLO technology. Some additional Intel Pro 1000 server adaptors fitted to each server provide much needed physical Ethernet ports. FYI – The Intel AMT only works with the built in Ethernet port on the motherboard of the server.
1 x Synology RS815 (Primary NAS)
Used as the primary storage device, IP surveillance and all sorts of services. 4 x 3.5TB Drives provide 9TB of available storage configured using Synology hybrid RAID. I could not justify the purchase of two of these units. It would be an inconvenience if it failed but easy to replace.

1 x Synology DS115 (Secondary NAS)
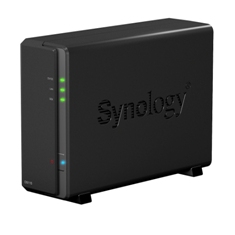
The primary RS815 NAS is set to run scheduled backups to this smaller DS115 unit. I’ve utilised the two free IP camera licences so if the primary NAS fails I at least have two of the five cameras still up and running until the primary NAS is replaced.
Some of the services running on the Primary NAS are mirrored on this little unit, for example ntp and syslog. As this device is a single drive only its storage is used as a remote network location for backups only.
It has to be said, I’m a huge fan of the Synology products. There fast, really easy to use, low power consumption and very stable.
 The Data Centre
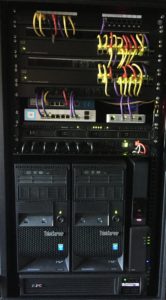
A 21U wall mount cabinet in the garage homes the core physical kit. Locating the cabinet in the garage is ideal from an environmental perspective. The garage is the coolest place in the house due to being brick built with no windows.
In the summer the side panels are removed from the cabinet to enhance air flow to keep the kit cool. This passive cooling approach works surprisingly well.
I custom made all the patch cables and power cables to the required lenght in an attempt to keep the inside of the cabinet tidy. This helps with airflow especially at the rear of the cabinet as my kit is front to rear airflow.
In the winter the cabinet has its panels re fitted to keep the kit warm despite the temperature dropping to really low levels.
Another smaller 9U cabinet also mounted in the garage houses the kit that is only powered up when needed. A port on an APC PDU enables me to power up / down kit housed in that cabinet remotely.
 The Access Layer
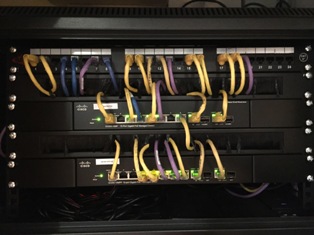
A smaller 6U cabinet located in a built in wardrobe in one of the bedrooms homes the SG300-10 POE switches.
Both the 6U and 21U cabinets are linked with Cat5e cables terminated to patch panels and power cables to enable the UPS to power the PDU in the 6U cabinet. All the lab kit is powered by the APC UPS.
The 6U cabinet is strategically placed on the first floor of the house fairly centrally to enable cables to be run to throughout the house easily using the floor and loft spaces. Pretty much all access layer devices such as the IP cameras, sky boxes, workstations and all manor of Internet of Things connect back to this 6U cabinet. Its amazing how many ports you can burn up. Sure, you can connect most devices using wireless to save on port density but I’ll always use wired Ethernet where possible, Especially IP Camera’s.
 Wireless
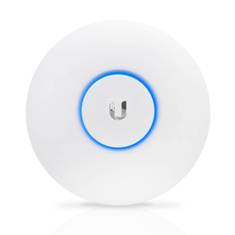
2 x Ubiquiti Unifi AP AC Pro’s take care of our wireless needs. The controller software is very good and make light work of installing and upgrading the AP’s. The AP’s look acceptable even in a house. One mounted on the ceiling in the hallway and another on the wall in our conservatory. The blue light they emit is bright but it can be turned off. We’ve left it on though as they make cool night lights 🙂
These AP’s in combination with the controller software are one of the best network upgrades I’ve made. They operate faultlessly and the seamless roaming between AP’s works really well. When my iPhone is paired with the hallway AP but I move outside to the garden it sometimes takes a while but eventually my iphone swings over to the Conservatory AP with the stronger signal. I was running with a single Cisco WAP 321 for a few years which served me well. Its going up on eBay soon with the proceeds from the auction going to another Unifi AP AC Pro to be installed in the Garage. The extra AP will give me all the wireless coverage I need.
Logical
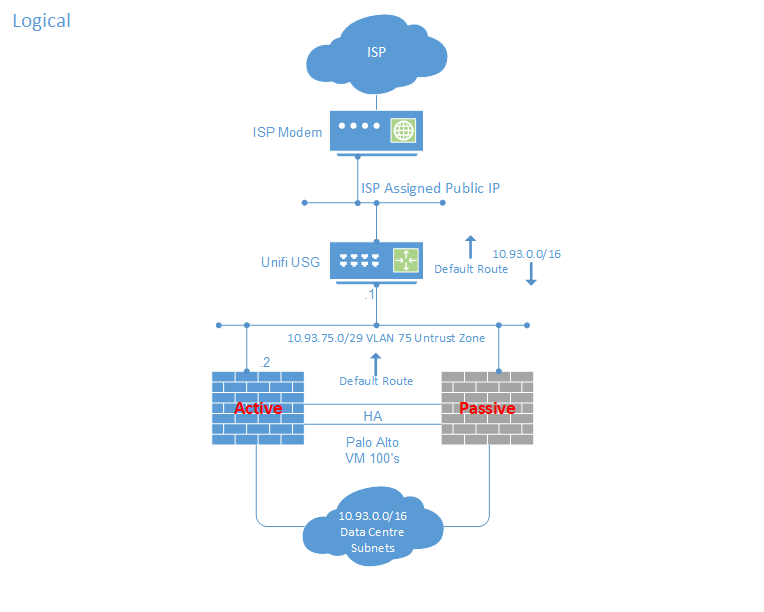
Two Palo Alto VM100 virtual firewalls in HA act as the core routers for my home network and lab. The VM’s run on the two Lenovo TS140 servers on VMware ESXi. Both servers connect to one of the SG300 20 port switches in use as core switches. The Unifi 8 port switch connects to each of the SG300-20’s with one of the ports on the Unifi switch in STP block. Its a shame the Unifi USG can not be configured to use both LAN ports in bridge mode. If this were possible I’d have probably not bothered with the 8 port switch and just patched each of the LAN ports on the USG into the Cisco SG300’s.
Internal Wiki
Consider running your own internal Wiki to support your the home lab. I use WordPress with a Wiki theme plugin which enables me to search for information just as you would using an internet based search engine:

The internal wiki is my repository of secret sauce recipes for network configurations and pretty much anything else for managing and supporting the home lab. I certainly would not be without it and its become a critical application to me. I actually use the wiki for all manor of things as its a really convenient way to store and access information.
Servers
Two Microsoft windows 2012 servers running as a VM’s on each hypervisor provide Active Directory, DNS, DHCP and various authentication applications for layer 7 enabled devices. For example Palo Alto’s User ID agent. I’ve leveraged the clustering and fail over functionality built into server 2012 for services like DHCP and DNS. Other services include Microsoft Certificate Services, IIS etc.
Various flavors of Linux servers provide many additional services and applications.
IP Surveillance and HDMI over IP to provide video/audio to other rooms in the house. NTP, syslog, SCP, NFS, iSCSI, TFTP services are provided by the Synology NAS devices. Synology make light work of standing up these types of services using applications native to the the Synology software. I try to leverage the Synology’s as much as possible to save valuable compute power on the hypervisors.
Remote Access
Palo Alto Global Protect is the primary remote access to the lab. I also run two OpenVPN access servers configured in a cluster (one on each hypervisor) provide a 2nd remote access method.
Both methods use client and server certificate authentication. Apps on my iPhone and clients on my laptop enable easy and reliable remote access to the lab. Another project on the horizon is to use a 4G router as an alternative remote access method to account for the Cable modem / ISP failure.
Monitoring / Logging / Alerting
SNMP
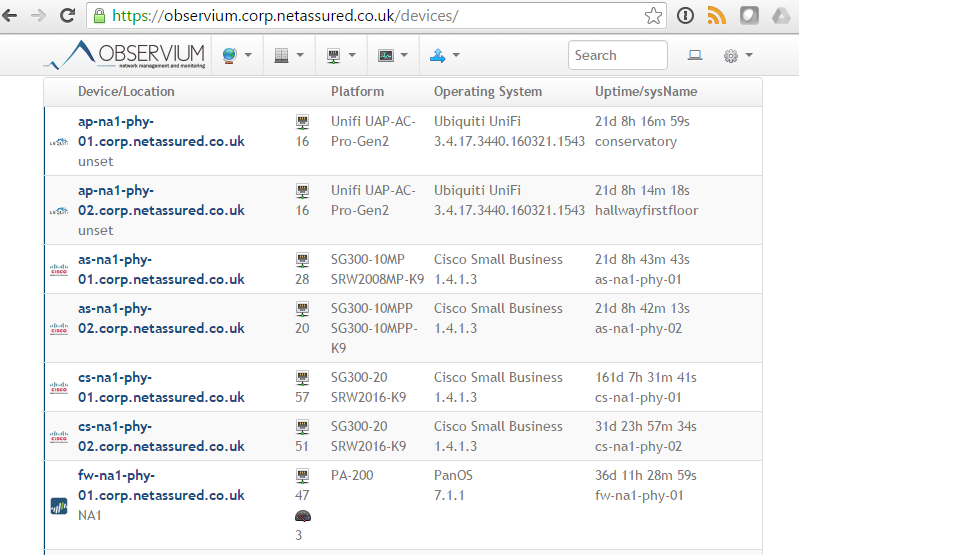
For SNMP monitoring I use the free community edition of Observium. To enable alerting in Observium you need to upgrade to the professional edition. I tried a number of SNMP monitoring solutions and Observium remains my favorite.
Alerting
Paessler PRTG is free up to 100 nodes including alerting. I’ve built two instances one on each hypervisor configured as a cluster. An armada of sensors enable very granular monitoring a favourite of mine being the SSL certificate sensor. This warns you if PRTG is unable to validate the certificate against a crl and when the certificate is due to expire.
A combination of using Observium and PRTG gives takes care of my monitoring and alerting needs for the lab. Hardly a single pane of glass but free and easy to configure and maintain.

Syslog
All devices in the lab syslog off to the Synology NAS servers. You can configure the Synology logging application to send email alerts for severity levels of syslog messages received. Key word alerting is really handy, I have a key word alert configured looking for the word “THREAT”. The Synology will send me an email should a received syslog message from the Palo Alto indicate the Threat IPS sensor has fired.
I’ve started using Splunk to report on syslog data. I’m so happy with its ease of use I’ll likely start firing some more traffic at it. The free version of Splunk does not support alerting though.
Cloud Monitoring
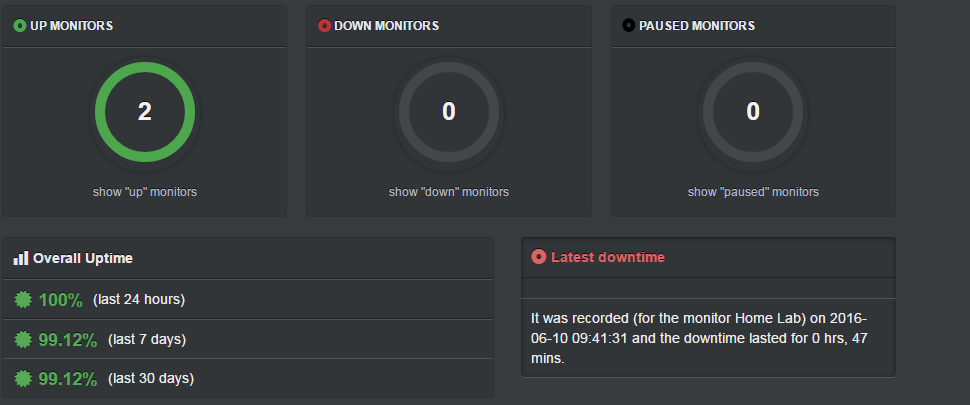
Uptime Robot provides cloud based monitoring of the lab and netassured.co.uk from the internet alerting me to any outages. Up to 50 nodes polled at 5 minute intervals are free but you can pay a subscription fee to get 1 minute intervals and more nodes.
Inventory Management
Currently I use Excel to track the network inventory, Once Jeremy Stretch releases his Open Source NetBox IPAM Application I’ll switch to using that as it looks awesome.
Backup / Recovery
I’ve adopted the 3-2-1 storage strategy. Backups are achieved using mixture of applications, old school bash / shell and expect scripts, and API’s. One example of which is the Palo Alto Firewall which has a REST API. Currently I use curl triggered by a bash script to backup the configuration of the Palo Alto firewall using the API. I’ve started looking into using Ansible in attempt to have a big boys centralized automation in my journey to become a full stack engineer.
The Synology NAS devices make light work of backing up my storage. The scheduling, de-duplication and performance is enough for my lab needs. The Synology’s backup to each other and my critical data is synced to my GoogleDrive using the Synology cloud sync application.
Veeam is used to backup all my VM’s on the hypervisors.
OOB (Out of Band Management)
Avocent Cyclades TS2000 Console server
The Cyclades Linux console server takes care of console access to all my physical devices. Avocent ceased production of the Cyclades a few years back but you can still find them for a good price on eBay. Beware though, these things are noisy! I only power mine up when I need it and when its on you can hear it and the other end of the house! Its powered by my APC PDU enabling me to power it on off remotely. During firmware upgrades of physical devices I’ll always establish an console connection to the device prior to the upgrade. You can then observe the boot process to check for any errors.
The console server is really useful when testing automation scripts. The majority of devices the only option for initial configuration is via the OOB console port.

Intel AMT
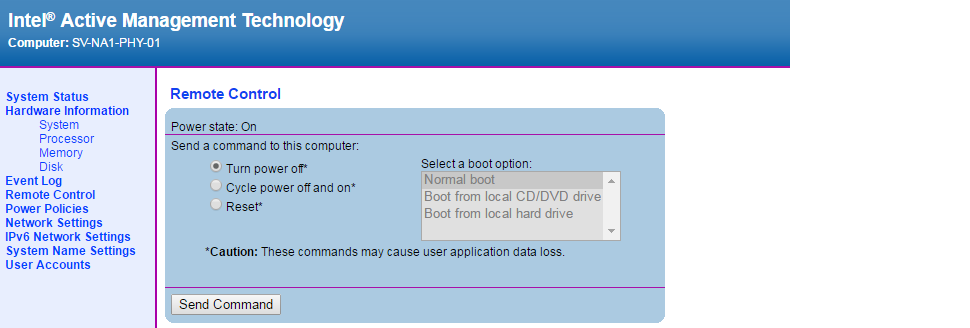
Intel AMT is baked right into the silicon on the Lenovo TS140 Servers. You can remotely power on / off the servers irrespective of the state of the OS running on them. This is really handy when we experience a power cut. APC PCNS is configured to gracefully shutdown my VMware hypervisors under power failure. With Intel AMT I can remote into the lab when the power is restored and turn the servers back on.
Power
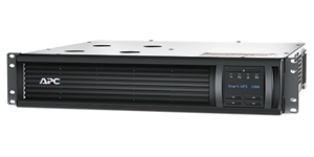 APC 1500 Smart UPS
The UPS provides the power for the entire network including the access switches in the remote locations around the house.
The optional ethernet management card enables me to use PCNS to shutdown devices gracefully under a power outage. The Synology NAS’s SNMP poll the UPS and when on low battery will gracefully shut themselves down. Don’t overlook having a UPS in the home lab. I certainly would not be without mine. I’d hate to experience data corruption caused by power outages.
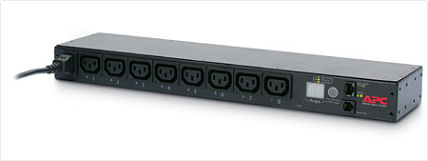 APC AP7920 PDU
Ethernet managed and controlled enabling me to power up /down devices in the lab remotely. Some devices have not be virtualised, for example the Juniper Netscreen firewall which runs ScreenOS. Having these devices connected to the PDU enables me to shut them down when not needed to save power. My ISP cable modem is connected to the PDU. A simple expect script monitors availability to the modem and the internet. Upon failure the script will telnet to the PDU and issue commands to bounce the power to the modem should connectivity fail.
How much did it all cost?
Not all the kit was purchased new, eBay is your friend. I would estimate I’ve spent around £3500. The equipment is a 5 – 7 year investment to me, yes some kit may be replaced during that time I guess. Based on 5 years the cost works out to be about £58 per month. As a self employed consultant the lab is critical to me so worth every penny.
Summary
Building the lab has been fun and a really valuable experience. Networking is not just a job to me, its a hobby and a passion. Despite its primary purpose being a a work tool, I thoroughly enjoy maintaining and improving an enterprise grade environment albeit at tiny scale.
In the next post I’ll compare having a physical lab vs a cloud based lab from a provider like Ravello

