One of the objectives of a recent home network redesign was to incorporate IP Surveillance cameras. I’ve always had external cameras at home, I like the assurance I get from 24 hour visibility of my property. It’s reassuring to access the surveillance setup remotely and check up on the house.
My old setup was a stand alone Triplex DVR with composite video cameras which I originally installed over 10 years ago. I could access the DVR remotely over IP using a client but the system was so old the software would only run on early versions of windows OS. It was time to out with the old and in with the new and so project surveillance was born.
The extra cost associated with adding surveillance to the new network consists of the following:
- 4 x IP Cameras, 3 External and 1 Internal
- 2 x Licences for the Synology surveillance software (The Synology NAS comes with 2 free licences)
External Cameras
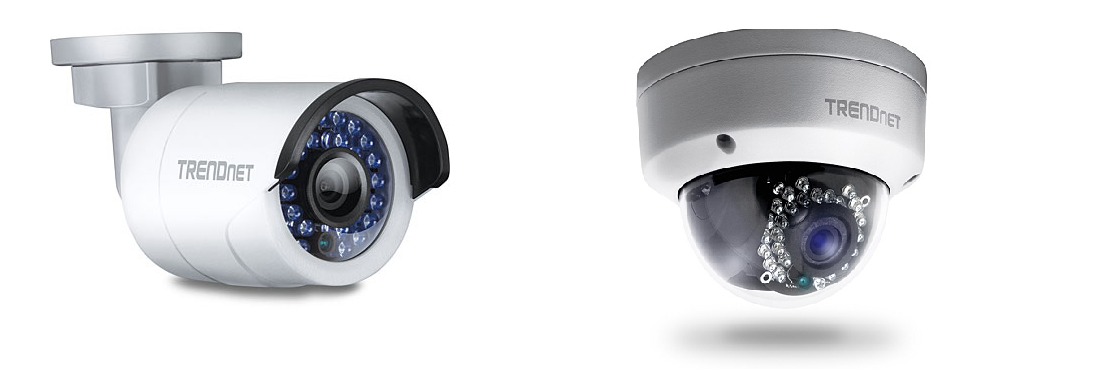
Two of the cameras are Trendnet TV-IP310PI (Bullet style) and one Trendnet TV-IP311PI (the dome camera) These cameras are surprisingly configurable for the price. Note that if you don’t utilize the POE you need to purchase a separate power adapter to power the camera.

Internal Camera
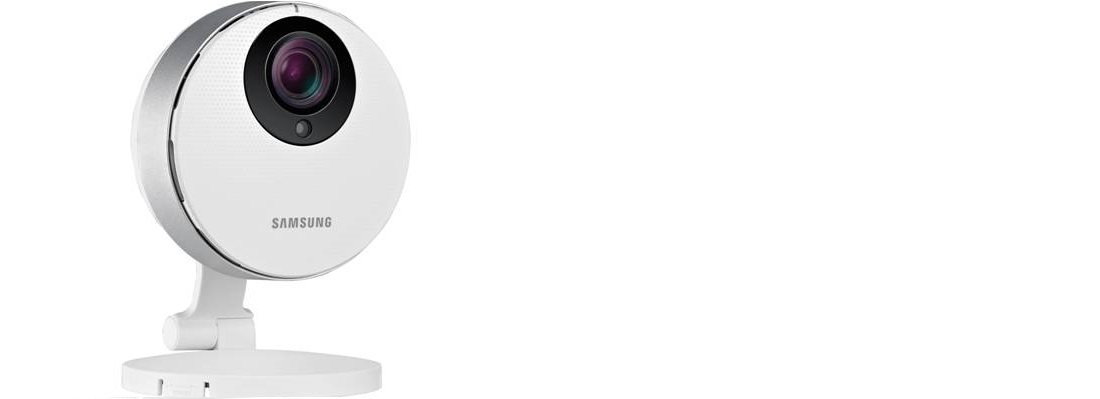
The Internal camera I chose is a Samsung SNH-P6410BN which can connect via wireless or Ethernet LAN (not POE though) I’m not a fan of the Samsung camera. You cant use the phone app unless you log into Samsung’s cloud and without the app your unable to configure most of the features. The Camera constantly tries to phone home to the Samsung cloud which I deny it doing so. I get the cloud thing from a functionality perspective but I don’t wish to use it. I want to be able to run the camera in my own private cloud. The wireless disconnects far to frequently for my liking (more on that later)
Camera Software
After much research the Synology RS815 NAS was selected as part of the network re-design to provide storage and other services. One of the appealing features to me was the built in Synology surveillance software.  Its easy to use and relatively flexible (more on that later).
You can use an App for your phone to stream live views of the cameras and watch recordings. Both the web GUI and the phone app is a pleasure to use, fast and responsive. You can scale up to 16 cameras with the RS815. It comes with 2 licences out the box but you can purchase additional licences in 1,2 or 4 x bundles.
Storage
A dedicated volume of 2 TB was created on the NAS for the surveillance software to record too. The software was configured to only record under motion detection. Two weeks of recordings for all four cameras consumed 135 GB of video which is 7% of the 2TB volume. As I’m using SHR RAID I can adjust the volume size should I need more or less space. I don’t intend keeping months worth of recordings, as long as I can go back about 4 weeks that’s fine with me.
Security
In my view IP cameras fall into the IoT category (Internet of things). I don’t trust them and took the following steps with regards to security:
- All the cameras reside in their own dedicated vlan. I have a Cisco SG300 series switches and a Cisco WAP 321 capable of multiple SSID’s. A new SSID was configured dedicated to the wireless camera’s to place them into the camera vlan.
- MAC based port security enabled on the switch POE ports connecting the external cameras. Should someone decide to remove a camera from the wall, re-terminate an RJ45 plug and connect something to it the port on the switch will disable upon detecting a MAC address other than the camera. A syslog message will be sent from the switch to the NAS (the Synology is a fairly good free syslog receiver) which will in turn send me an email alerting of the port violation. The Synology surveillance is also configured to alert me via email that the camera was disconnected.
- Remove the sticky label from the camera housing that reveals the mac address of the camera! 🙂
- ACL configured on the camera vlan to only permit required services from the cameras to the Synology NAS and my management network only.
Performance
I’ve tuned my home network equipment to get the best performance I can. Live viewing of the cameras is fast and faultless and watching playbacks of recordings is near instant. The RS815 is a fairly good performer though. Obviousley a lower spec NAS might not perform as well.
Bandwidth
In the current configuration the 4 x cameras I have use around 50 Mbps of bandwidth whilst streamed to the Synology NAS. I do have the quality settings turned up quite high though. Less quality = less bandwidth. I’m going to add additional cameras in the near future so the bandwidth consumption is going to increase. I have port channels (LAG) between the switches so I’m confident I can scale up the surveillance without bandwidth concerns.
Another service I run over my home network is HDMI over IP. This uses much more bandwidth than the cameras do. A subject for a future blog post 🙂 I mention this because if your planning to install an IP surveillance solution be mindful of the bandwidth consumption on your network. Know your network performance baseline.
Installation
 Cat5e cables were installed to the camera locations ensuring the cables passed through the center bracket of the camera so as not to have any cable externally exposed. Be aware that the hole required to do this on the TrendNet bullet cameras is 25mm. That’s quite a sizable drill bit required if drilling through masonry. In a previous life I used to install external data networking equipment, I had the drill bit and big boys battery drill required for this install.
Running cables in a house and concealing them can be a challenging task. When I first started renovating our house almost 16 years ago I strategically installed a small SOHO 10″ cabinet in a wardrobe of one of the upstairs bedrooms and a 19″ 21U cabinet in the garage. From each cabinet I ran cables to various locations around the house as well as cables between the two cabinets. I still needed to run new cables to the IP camera locations but it was a much simpler task as I could choose the closest cabinet to the camera.
The cameras were positioned at a height that I could reach them without needing a ladder. This was done for two reasons:
- If you mount them high and they record a public highway (road or footpath) or someone else’s property you can potentially be sent to prison as its illegal to do so.
- The night vision IR LED’s on the cameras attract creepy crawlies and spiders that will make webs over the camera lenses. Because of this I need to clean the camera lenses frequently. If I had to access the cameras using a ladder I would be less likely to clean them so often. The lenses need to be kept clean to maintain good clear image quality especially at night time as the IR light required for night vision reflects of the spider webs distorting the image.
A fair amount of post installation tuning was required, especially with regards to motion detection sensitivity and testing the alerting functionality.
Wireless vs wired Camera’s
The Synology software can send alerts via email one of which is lost connection to a camera. Whilst on the wireless network the Samsung camera was disconnecting several times or more in a 24 hour period. Not sure if this is a trait of the Samsung camera or the nature of radio communication. This quickly became annoying as I was getting alert exhaustion to the point I started ignoring the emails. Unfortunately the Synology camera software does not enable you to turn off email alerts on a per camera basis which is a little frustrating. In the end I connected the Samsung to an Ethernet wired connection instead which took another half a day to install the cable.
Since moving to all wired connections I’ve so far not had any alerts for camera disconnections. I’m not sure I’d use wireless for IP cameras for that reason. It is handy to have a wireless camera though as you can move it around perhaps for temporary reasons etc. I guess you’d have to decide if the cost and hassle of running cables to each of the camera locations is worth it for you.
How much did it cost?
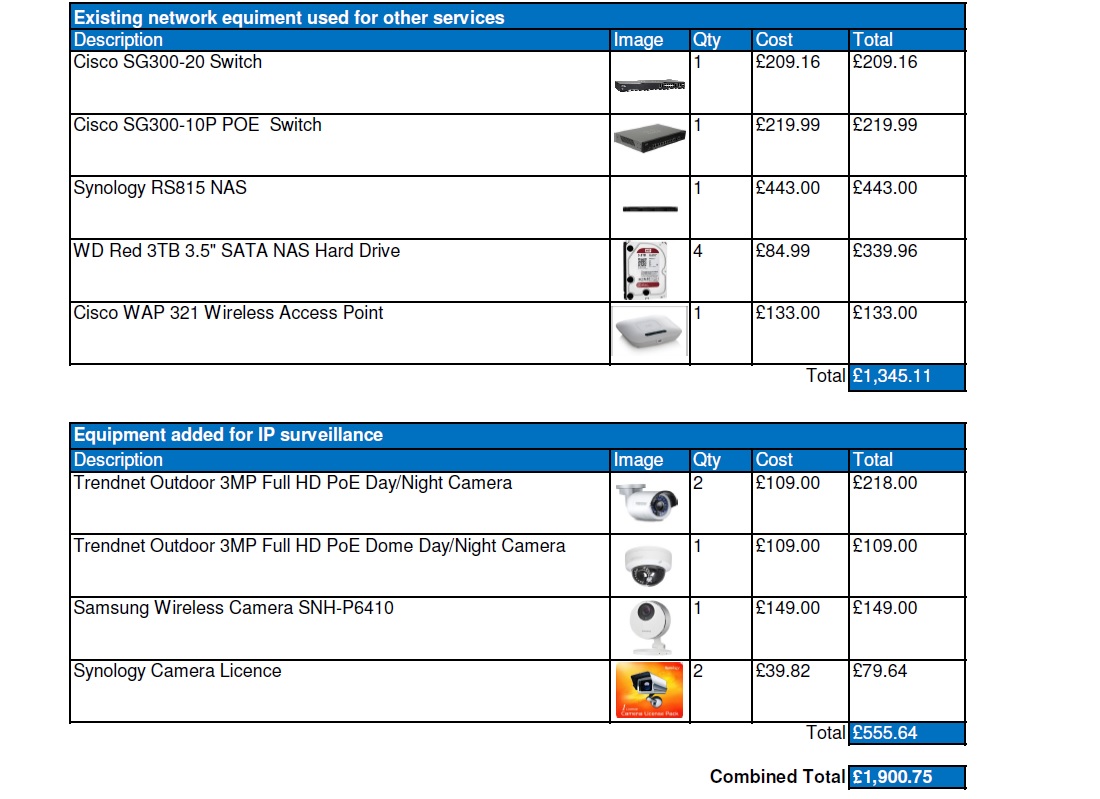
Remember that IP surveillance was added to my existing home network. The first section below is the cost of all the equipment in my home network that the surveillance element uses. The second section is a total for adding the surveillance aspect only:

The cost to add the surveillance aspect is comparative to a stand alone 4 X camera DVR package, assuming you already have a NAS and POE switch. You can certainly build a system for less but it depends on your requirements.
I installed all the cameras and cabling my self saving the install costs. Not sure how much that would cost although I have heard figures of around 3 – 5K for a basic install.
Summary
I’m more than happy with the setup especially since moving the wireless camera to a wired connection. All features are fast, so far been reliable and user friendly. The Synology software really is a joy to use as is the GUI for all features of the NAS of which I’m a huge fan.
Had I known the issues I experienced with the Samsung camera I would have purchased another TrendNet. I chose the Samsung as it appeared a good fit for our needs as an internal wireless camera.
Cameras installed at home are useful in many ways. Just the other day we were expecting a delivery of a parcel which according to the courier had been delivered. A review of the camera footage revealed the delivery driver had put the parcel into the electrical meter cupboard but not left a card through the door!
IP cameras make great baby / children monitors. We use them for keeping tabs on our 4 year old son. Being able to view the cameras simultaneously on virtually any IP connected device via Apps is fantastic.

